Water tank cleaning is essential for maintaining safe, clean, and potable water in residential, commercial, and industrial settings. Over time, water tanks can accumulate sediment, algae, bacteria, and other contaminants that compromise water quality and pose health risks.
Whether you’re a homeowner or a facility manager, understanding how to clean a water tank professionally ensures long-term hygiene and water safety. In this blog, we’ll walk you through a step-by-step guide to professional water tank cleaning, tools and products required, and best practices to ensure optimal results.
Why Water Tank Cleaning Is Important
Before diving into the cleaning process, it’s important to understand why water tank cleaning is necessary:
Prevents waterborne diseases such as cholera, typhoid, and dysentery.
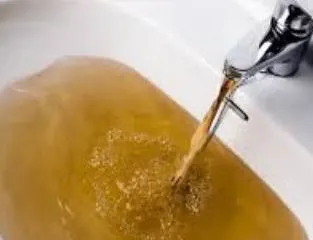
Improves water taste, smell, and appearance.
Extends the lifespan of the tank and plumbing system.
Complies with local health and safety regulations (especially in hotels, hospitals, and schools).
Step-by-Step Guide to Professional Water Tank Cleaning
1. Preparation and Safety Measures
Before beginning the cleaning process:
Turn off the water supply.
Ensure the tank is drained.
Use personal protective equipment (PPE): gloves, masks, and goggles.
Secure the area to avoid accidents or contamination.
2. Inspection of the Tank
Conduct a visual inspection for:
Cracks or leaks
Rust (in case of metal tanks)
Mold, algae, or pest presence
Document any damage and perform minor repairs if needed before cleaning.
3. Manual Sludge Removal
Remove sludge, dirt, and debris manually from the bottom of the tank using:
Buckets
Brushes
Wet/dry vacuum (if available)
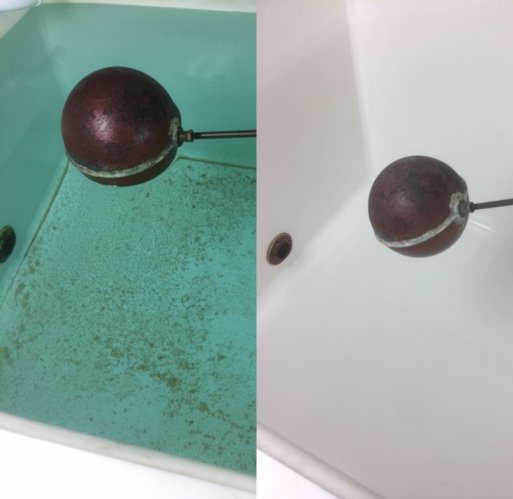
This step helps eliminate the bulk of physical contaminants before chemical treatment.
4. High-Pressure Jet Cleaning
Use high-pressure water jets to scrub tank walls, ceilings, and floors. This process:
Removes biofilms
Dislodges stuck-on sediments
Reaches corners and curves efficiently
5. Disinfection and Sanitization
A crucial step in professional water tank cleaning:
Use Dubai Municipality-approved disinfectants
Apply the disinfectant evenly across all internal surfaces.
Let it sit for at least 30–60 minutes to ensure effective microbial kill.
6. Final Rinse and Drying
Rinse the tank thoroughly with clean water to remove any chemical residues. Then:
Allow the tank to air dry completely
Inspect for any remaining debris or residue
7. Refill and Post-Cleaning Checks
Once the tank is clean:
Refill with fresh water
Test water quality for pH, turbidity, and chlorine levels
Resume normal water supply
Tools and Equipment Needed
High-pressure jet machine
Submersible pump
Sludge removal tools (buckets, brushes, vacuum)
Safety gear (PPE)
Approved disinfectant chemicals
Water quality testing kits
How Often Should You Clean Your Water Tank?
Residential tanks: Every 6–12 months
Commercial/industrial tanks: Every 3–6 months
Hospitals, schools, and hotels: At least quarterly, or as per local health regulations
Final Thoughts
Professional water tank cleaning is more than just removing dirt—it’s a comprehensive sanitation process that protects public health and ensures water quality. Whether you’re maintaining a residential system or managing a commercial facility, regular tank cleaning is a small investment for long-term benefits.
For the best results, consider hiring licensed professionals who use approved chemicals, provide necessary documentation, and follow safety standards.
Need Help with Water Tank Cleaning?
If you’re looking for reliable water tank cleaning services in Dubai, contact our team today. We provide certified cleaning solutions with complete documentation and Dubai Municipality compliance.